ADD A CONTACT PAGE TO YOUR WEBSITE
Learn how to add contact page to your website with our step by step guide.
STEP 1:
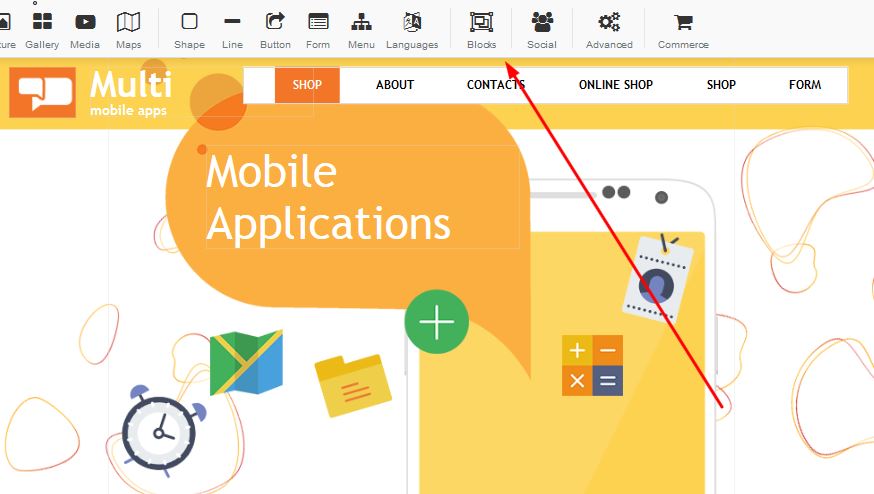
Click on the "Blocks" Icon:
STEP 2:
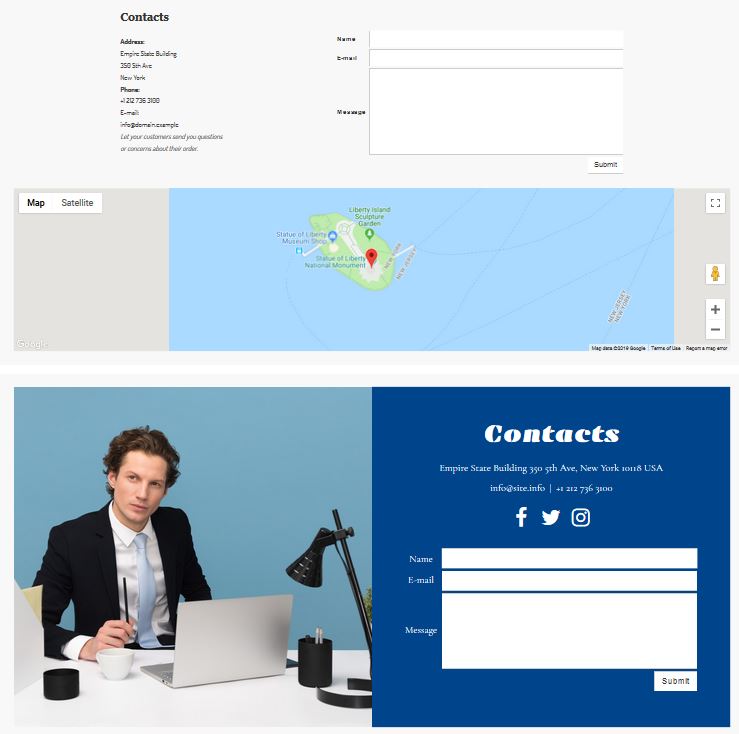
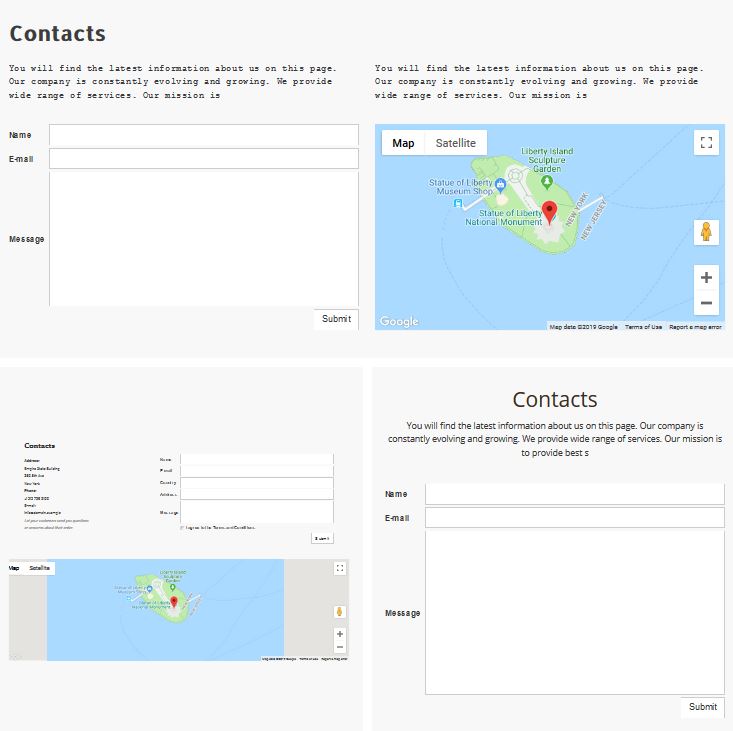
Under the "Blocks" section, you will find a variety of contact us options:
STEP 3:
Once you have selected the type of block you would like to use, you click apply.
STEP 4:
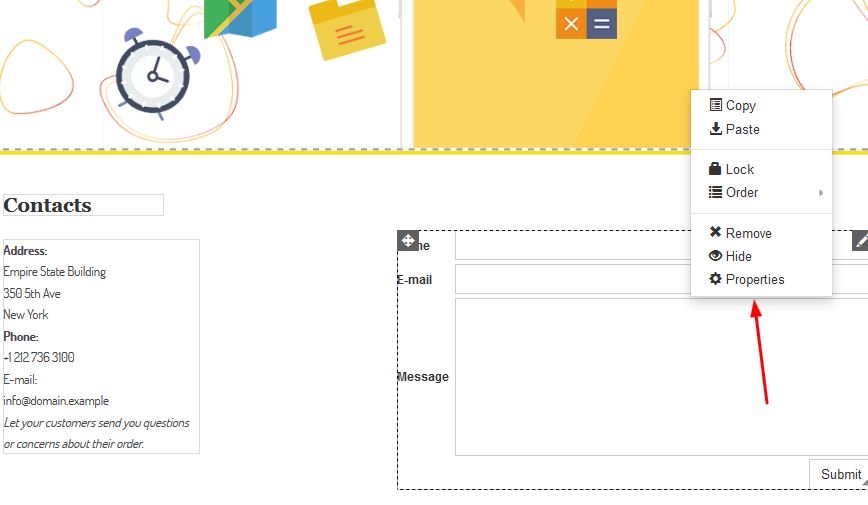
In order to change the details of the block, right click and select properties:
STEP 5:
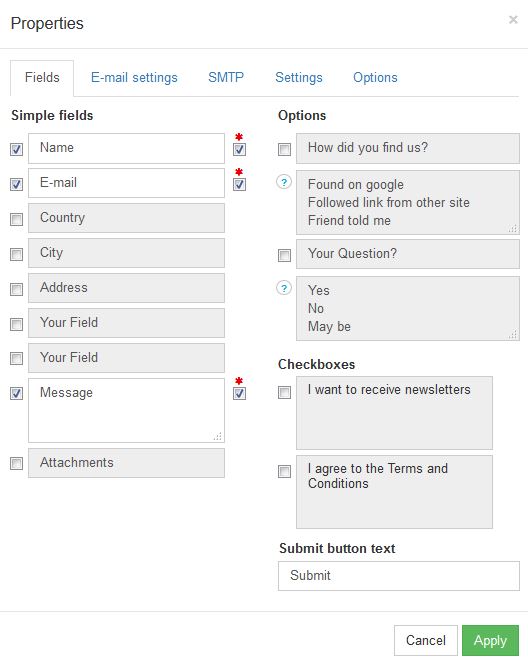
Once your properties box opens, you will be able to update the form as per your requirements (Only tick on the blocks you require - if you do not need a certain block eg. Address, you can utick this to remove from your contact form):
- Name (Your clients are able to enter their name - this can be edited should you prefer making use of a different word)
- Email (Your clients are able to enter their surname - this can be edited should you prefer making use of a different word)
- Country (Your clients can enter their country - this can be edited should you prefer making use of a different word)
- City (Your clients can enter their city - this can be edited should you prefer making use of a different word)
- Address(Your clients can enter their address -this can be edited should you prefer making use of a different word)
- Your field - (This field you can edit - if there is something you require specifically)
- Your field - (This field you can edit - if there is something you require specifically)
- Message - Clients are able to type a detailed descirption as per the services you are offering / selling
- Attachments - Clients are able to upload documents that you might require
OPTIONS:
- How did you find us - Great way to see how clients found your website
- Fond on google - Here you are able to edit the wording e.g. Found you on Facebook etc
- Your Questions - Here you can ask your client a question
- Checkboxes - Clients can click yes No Maybe etc, this can however be edited according to your requirements.
- Terms and Conditions - Shoudl you require that clients accept terms and conditions, you can request they confirm this by clicking on the button.
STEP 6:
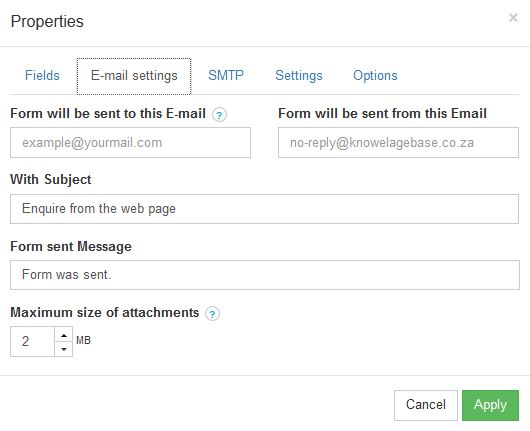
Under E-mail settings, you are able to add the email address whereby the contact form should be sent.
Under the "Form will be sent to this E-mail address" - you need to insert your email address
With Subject: You can edit this to the wording of your choice
Form Sent: You can edit wording
Maximum size of attachments: You can confirm the amount of space clients may make use of when attaching documents that they wish to send to you.
STEP 7:
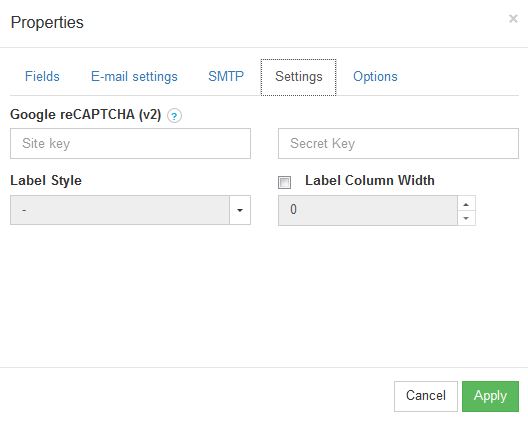
The recaptcha is a anti contact form spam tool, if you want to enable Recapta, create an account with Google below:
https://www.google.com/recaptcha/intro/v3.html
STEP 9:
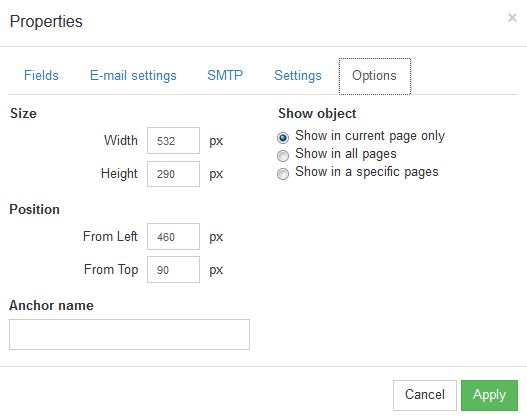
Under options, you can select if you would like this contact form to be displayed on one page, specific page or all pages:
STEP 10:
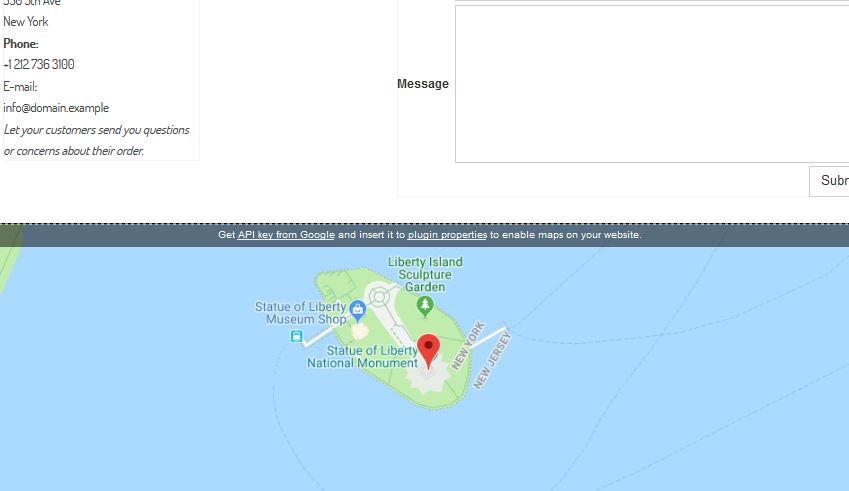
Should you wish to have a map on your contact form, you will follow the instructions on step 11. You are able to delete the map my clicking on the map and pressing delete:
STEP 11:
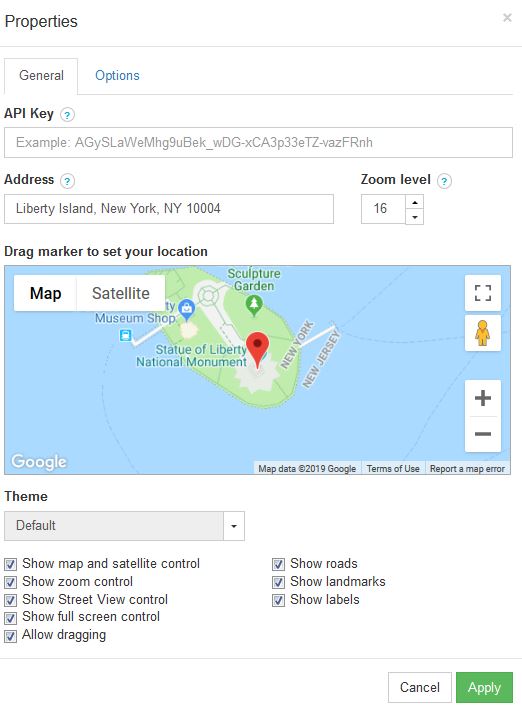
In order to update the address on your map, select properties by right clicking on the map: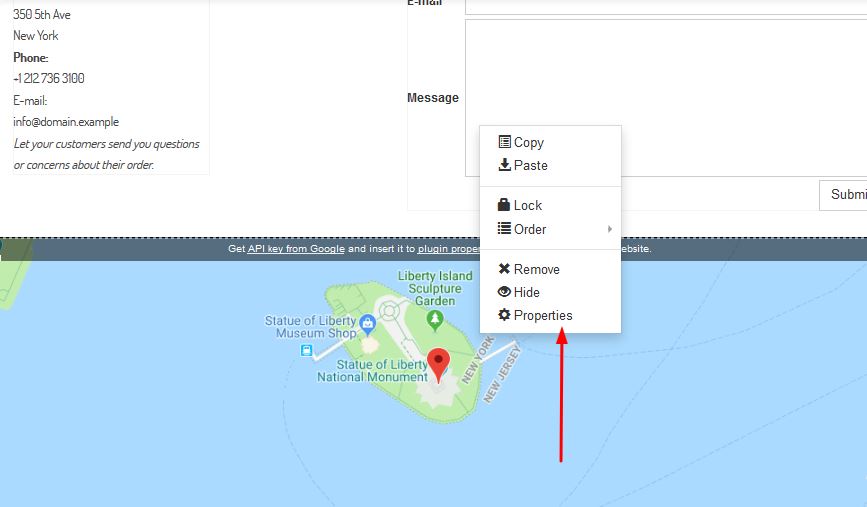
STEP 12:
Under general, add your address under "address" - in order to obtain an API Key - Please contact us
